Kings and Queens!

Well, I’m writing about January’s activities a little late, but better late than never, right?

I hope you had a wonderful start to the new year…speaking of *New* we wanted to do a brand new theme we had never done before and so we decided on “Kings and Queens.”

What kid doesn’t like to dress up at least once in their life as royalty? Even adults still like to do it! 🙂

Week 1:

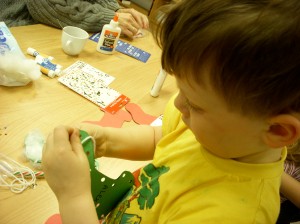
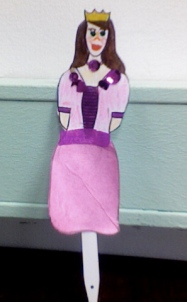
We read a fun book called The Prince’s Tooth Is Loose and made King and Queen (or Prince and Princess) paper puppets on a stick. The kids took a king or queen cut-out and decorated it with everything from tissue paper to glitter and then glued it on a stick. The directions don’t get much simpler than that, but the kids had a blast playing and pretending with them.

Week 2:

We read the story of King Solomon from the bible. King Solomon is a famously wise king in history and as a fun craft to go with our story, we made crowns out of poster board and covered them in aluminum and jewel stickers.

Week 3:

Our last week we read the story of Sleeping Beauty (according to Walt Disney 🙂 ) and made a neat castle collage from sandpaper. We printed a coloring picture of a simple castle and provided sandpaper cut into different shapes. The kids glued the sandpaper onto the castle picture for the “stone” and then colored in the rest. You will see in the picture, that we also glued a small picture of a little king and queen behind our flap door.

**February’s Theme: House pets and snacks! **

Posted in Uncategorized | Tagged , , , , , , , , , , , , , , , | Leave a comment

The Meaning of Christmas

Well, it’s Christmastime again!  It’s hard to believe how fast each year flies and when I go back and look at all the different things we’ve done this year in the playgroup, it’s amazing to me that we did so much in one year!  The past couple of years during Christmastime, we’ve enjoyed taking a look at the true meaning of Christmas.  So much so, that we’ve kind of made it a tradition to use the wonderful, colorful books of Crystal Bowman to link symbols of Christmas that we see around us to the true meaning of Christmas…the celebration of the birth of Jesus Christ.

Here’s some of the fun we had this Advent season:

Week 1:

This year, we started our Christmas them in November, since the first Advent Sunday fell just before our last playgroup in November.  We read the book My Christmas Stocking: Filled With God’s Love since our Tuesday came just before St. Nicolas Day here in Germany.  This book tells of the origins of a man named Nicolas and how he gave gifts to others in thankfulness for God’s gift of Jesus.  For our craft, we cut out little paper stocking outlines from construction paper and put two of them together.  Then we hole-punched around the edge and the kids “sewed” them together by weaving white yarn in and out of the holes.  We tied them off, leaving a hanging loop and then glued white cotton fluff on the top part of the stocking.  Then we decorated them with stickers and markers. As a treat, we put a candy and a little chocolate Saint Nick in the mini-stockings.  We also sang “Jolly Old Saint Nicolas” for one of our songs, although American and German traditions of Saint Nicolas differ a little bit!

Week 2:

This week we read Christmas Angels, by Bowman and read about the angels at the birth of Jesus.  We made a really cute little craft that required some preparation beforehand, but was worth the work, because the results were so sweet!  These little angels were made from elbow, bowtie and rigatoni pasta, which was spray-painted gold the day before and left to dry.  We used tacky glue to glue the bowtie onto the back of the rigatoni noodle for wings and then we glued two pieces of elbow pasta to the sides of the rigatoni for arms.  We took wooden beads and drew faces on them.  Then we took a pipe cleaner and formed a halo at one end.  We threaded the rest through the wooden bead and the rigatoni pasta and just bent it up behind the angel, flush with the pasta to anchor  everything.  We glued yarn on the bead for hair and made a loop to hang our angel from the Christmas tree.

Week 3:

The last book we read was called My Christmas Gift and this book talked about why we give gifts to each other at Christmas and what the greatest gift God gave the world was:  it was Jesus.  For this simple craft, we cut patterned paper 9 x 9 inches square.  I used some nice card stock scrapbooking paper that was double sided with print.  On one side, we measured 3 inches from the corner and cut in 3 inches.  Then from that slit we measured another 3 inches and cut in again three inches.  Then we did the same on the opposite side.  We then had three tabs on each side that we folded in to make a creased square in the middle and then left it open again.  We folded up the tabs on each side, overlapping them a little to look like a basket, then poked a hole through all three layers on each side.  Then we took a strip of paper and added it like a handle for the basket, bringing the ends down to overlap with the tabs and we put a brad through all three flaps AND the end of the paper handle to anchor it on both sides.  So we ended up with a paper gift basket!  We put some stickers and candy in them for the kids and even made some extras…they were so easy to make!

We hope you have a wonderful, Merry Christmas and hope to see you again in the New Year!

***Theme for January: Kings and Queens, Princes and Princesses!  Come play with us!***

Posted in Uncategorized | Tagged , , , , , , , , , , , , | 1 Comment

November-Fun in the Fall!

This month we finally got around to our Fall theme!  Fall is my favorite time of year with all of the changing colors that nature has to offer.  We read some fall books called Fall Leaves, by Mary Packard and It’s Fall, by Linda Glaser that described fun fall activities and what happens in nature when fall comes around.  The animals gather food for hibernation, the leaves change their color and children are jumping in piles of leaves and starting to bundle up when they go outside!

Here are some of the fall crafts that we made in November:

Week 1: We made our window leaf based on this craft from All Kids Network.com. It was something fun for even the littlest hands to do: shredding tissue paper is right up their alley!

Week 2: We made some Nutty Squirrels based on this craft at Familyfun.com.  We added a special feature to ours, though.  We also pre-painted toilet paper rolls and shoved an individual egg carton into the bottom of it.  Then we poured in un-shelled peanuts and topped it with our squirrel’s head.  The tail, we stuck into the lower portion of the toilet paper roll instead of the egg carton head, like on Familyfun.  Then we added some felt arms that held a peanut or acorn.  See how cute it turned out!

Although this squirrel is missing his black pom-pom nose I just realized!  Go to our photos to see all of our little squirrels and how we made them.

The second half of November, we celebrated Thanksgiving as done in the United States.  We read two stories: My Thanksgiving Prayer, by Crystal Bowman showed us some of the things we remember at Thanksgiving…reasons we are thankful.  The Story of Thanksgiving, by Nancy Skarmeas is a wonderful board book for small children that gives a very basic but accurate description of the origin of the first Thanksgiving.

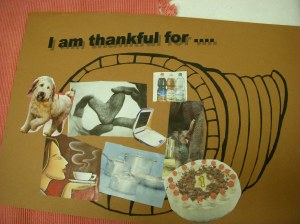
Week 3: For our first Thanksgiving craft, we focused on what we are thankful for in our everyday lives.  We printed out a cornucopia outline on brown construction paper.  Then the kids cut out all sorts of pictures out of old magazines that showed things they were thankful for and glued them onto the cornucopia.

This one was actually done by Kendra, an adult, so that’s why there is coffee on the cornucopia! 🙂

Week 4: We made a fun Turkey Hat in celebration of the centerpiece of the American Thanksgiving…the Turkey!  We don’t have any pictures from this week, but I invite you to go over to see FamilyFun’s Turkey Hat, which is what we used for our craft!

Our last week in November, we kicked off our Christmas season, since here in Germany, the Adventzeit has officially begun!  We’ll be writing a blog post soon with our new pictures and activities during the Christmas season.

**December’s Theme: The Meaning of Christmas–Come play with us!**

Posted in Uncategorized | Tagged , , , , , , , , , , , , , , | Leave a comment

What’s The Weather?

What’s the weather, everyone?  That was our theme for October: Weather!  We sang an easy song titled “What’s the weather everyone?” to the tune of “Oh My Darlin’, Clementine:”

What’s the weather, what’s the weather,

what’s the weather, everyone?

Is it windy? Is it cloudy?

Is there rain or is there sun?

We used laminated pictures to hold up for each kind of weather or used our hands and arms to make motions that represented each form of weather.

Week 1:

We had some great kite-flying-weather at the beginning of October here in Dresden, so we started off with the book “Curious George: The Kite.”  We made real 20-minute kites from Familyfun that we’ve made in years past because they’re so great and  easy to make–and they really do fly!  But for those who wanted a more low-key craft we also offered a simple cut and glue paper kite craft from DLTK, as well.

Week 2:

I couldn’t resist reading Cloudy With a Chance of Meatballs for our weather theme.  This crazy story of the town Chewandswallow, which has food weather instead of real weather, is a whimsical complement to our books on weather this month.  To go along with it, we did a whimsical craft: A pinwheel.  There are many pinwheel crafts out there on the internet, but you can start by looking at the directions provided by Enchantedlearning.  Here are some differences that made our craft simpler: we used double-sided scrapbooking paper. That way you just need the one square of paper.  Also, we found that the pushpin did not stay in, so we purchased some long, thin, necklace connectors at a craft store.  They look like a blunt needle with a loop at one end.  We put a bead on the necklace pin, then pushed the pin through the folded paper, then put on another bead for smoothness in the rotation and then stuck it through the eraser. Then we bent the pin to a right angle to keep it from coming back out of the eraser.  If you can’t find this little necklace device, then I’m sure you can find something similar at a hobby store.

Week 3:

A famous children’s story from the bible, Noah’s Ark, offers lots of opportunity to discuss weather!  40 days and nights of pouring rain is quite something!  The book that we used described thunder, lightening, rain and sunshine…not to mention the wonderful promise of the rainbow.

We sang a fun interactive song that we sing often in bible class here in the Gemeinde Christi called “Noah Built the Ark,” in which we each threw a toy animal of our choosing into a toy ark.  You could also throw stuffed animals into any kind of container for this easy song.

As our Noah’s Ark craft, we made an ark by stapling a half-size paper plate to a full-sized one, insides facing, so there was a little space in between.  The kids colored a rainbow on the upper half of the whole plate that was sticking up above with markers.  Then they colored the lower half plate with brown for the ark.  They cut out pre-printed animals and colored them to stick in the ‘ark.’  Don’t forget to put Noah in!

***A fun activity to go along with ‘rain’ was making “indoor rain.”  Begin by having everyone tap their first two fingers against the palm of the other hand.  Then have some switch to snapping, if they’re able. Then have everyone switch to patting their knees going faster and faster, then end up pounding on the floor (we have linoleum, but you could use a book in front of you if you have carpet).  The result is a neat “rain” sensation!***

Week 4:

We’ve read Millions of Snowflakes in our playgroup before for a winter theme, but I had a fun and easy craft for snowflakes that I couldn’t wait to use, and snow is part of weather, too, right?

What could be simpler?  All you need is silver pipe cleaners, crystal-style beads and fishing line or clear string.  Cut the pipe cleaners into lengths of 4-5 inches, depending on how big you want your snowflake.  Take two pipe cleaners and twist one of them around the other right in the middle.  Wrap others one at a time (using 4-6 pipe cleaners) around the others in the middle as tight as you can.  You really only need to wrap them around 1 1/2 times.  The result should be 4-6 pipe cleaners joined in the middle with ends sticking out every which way.  Now just slide 4-5 beads on each pipe cleaner end that is stick out, with spaces between the beads, so you can see the silver in between each one.  Stick one end of a length of clear string through the middle of the snowflake and tie with a loop as you like, to hang on a doorknob, from a garland or Christmas tree.  Here is another, slightly different way of doing it at Family fun.

** November’s Theme: “Fun in the Fall!” Come play with us!**

(Parents, bring along some outdoor fall leaves with you this month to playgroup for some fun activities during circle time!)

Posted in Uncategorized | Tagged , , , , , , , , , , , , , , , , , , , | Leave a comment

Just for fun!

In September, our theme was Just For Fun!  We decided to read the books Cat In the Hat, by Dr. Suess, Giraffes Can’t Dance, by Giles Andreae  and The Gruffalo by Donaldson and Scheffler , since those kinds of fun books often get left out of our normal monthly themes. 

We made Cat in the Hat hats, marionette Giraffes out of toilet paper rolls and a brown bag mouse puppet as our crafts for the month.  Unfortunately, I don’t have a lot of good pictures, since I had trouble finding my camera 😦 however, you can trust me wen I say that we had a lot of fun at playgroup this month–just for fun!


October’s Theme: **Weather!!** — Come play with us!

Posted in Uncategorized | 2 Comments